How to Close Your Pool for the Season


Article TLDR:
-
Close when water temperature is consistently below 65°F. Not earlier, or algae can form before the water gets cold enough to suppress it.
-
Clean the pool thoroughly, balance chemistry, and shock before closing — keep the pump running for at least 12 hours after shocking before covering. Unbalanced water sitting all winter causes staining, scaling, and liner damage.
-
Lower the water level, winterize the plumbing lines, and add pool antifreeze where recommended. Skipping this in freezing climates risks cracked pipes and pump housings.
-
Drain and store equipment indoors. Cover the pool with a well-fitted winter cover.
-
A proper closing takes a few hours but is worth it. Skipping steps can create expensive problems in spring.
Closing your pool for the season is one of the more consequential maintenance tasks of the year — and one of the easiest to shortcut. Done properly, you'll open to clean, balanced water in spring with minimal work. Done poorly, you risk cracked pipes, a green pool on opening day, and staining or scaling that can permanently damage surfaces. I've seen it go both ways. This guide covers every step, in order, so you don't have to find out the hard way.
When to Close Your Pool
Close when the water temperature is consistently below 65°F. This is the point where algae growth slows dramatically. Close too early, and algae can continue growing before the water cools enough to naturally suppress it.
In most climates, this means early-to-mid fall. Don't close too late either as once temperatures start dropping toward freezing, you're at risk of equipment damage if you haven't completed the closing process.
A waterproof pool thermometer takes the guesswork out of timing. Don't rely on air temperature alone because water temperature lags behind and is what actually matters here.
Step 1: Clean the Pool Thoroughly
Before adding any closing chemicals, get the pool as clean as possible:
-
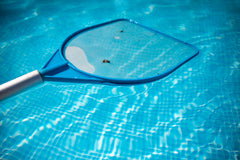
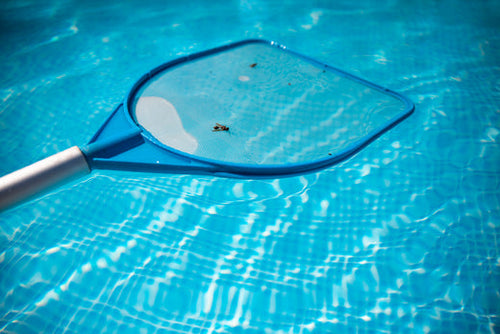
Skim the surface and remove all floating debris
-
Brush the walls and floor to dislodge any algae or buildup
-
Vacuum the floor to remove everything that brushing dislodged
-
Remove accessories such as ladders, handrails, pool toys, automatic cleaners, skimmer baskets, and rinse them off and store somewhere dry
Anything left in the water over winter provides fuel for algae and bacteria. A clean pool going in means a much easier opening the following spring.
Step 2: Balance the Water Chemistry
This is the step that most directly affects what you find when you open in spring. Unbalanced water sitting for months will corrode metal fittings, stain the liner or plaster, and cause scaling. Test and adjust each of the following before closing:
|
Parameter |
Target for Closing |
|
Total Alkalinity |
80–120 ppm |
|
pH |
7.2–7.6 |
|
Calcium Hardness |
200–400 ppm for plaster/concrete 150–250 ppm for vinyl or fiberglass pools |
|
Cyanuric Acid (CYA) |
30–50 ppm |
Adjust alkalinity first, then pH, then calcium hardness. Allow the pump to circulate the water for at least 30–60 minutes after each adjustment (or follow the product label) before retesting and moving on to the next chemical.
Step 3: Shock the Pool
Once the water is balanced, shock to bring free chlorine up to 10–12 ppm. This is higher than normal swimming levels because the goal is to kill any remaining bacteria and algae before you close the lid on the water for months.
Add shock in the evening so UV doesn't burn it off before it can work. Run the pump for at least 12 hours after shocking, or according to the shock product's instructions. Allow chlorine to drop back to 1–3 ppm before adding any algaecide — high chlorine levels degrade algaecide quickly if added at the same time.
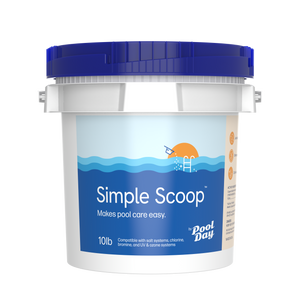
To make the winterizing process easier, a double dose of Simple Scoop acts as both the shock and algaecide. Add it at closing to keep the water protected through the off-season without the need for separate winterizing chemicals.
Step 4: Clean and Backwash the Filter
Before shutting down filtration for the winter:
-
Sand and DE filters: Backwash thoroughly to flush out trapped debris, then drain completely.
-
Cartridge filters: Remove and clean the cartridge, let it dry fully, then store it indoors.
Any water left inside the filter can freeze and crack the housing. After draining, remove the drain plug, pressure gauge, and sight glass, and store them inside the pump strainer basket where they won't get lost.
Step 5: Lower the Water Level
In-ground pools: Lower the water level to about 4–6 inches below the skimmer opening. This prevents water from sitting in the skimmer and freezing.
Above-ground pools: Lower the level only slightly, just below the return jet fitting. Don't drain too much from an above-ground pool; the liner can shrink, crinkle, or detach if the water level drops too low.
Use a submersible pump or your pool's backwash line to drain to the correct level.
Step 6: Blow Out the Lines
This is the most important freeze-protection step for in-ground pools. Any water remaining in the plumbing lines will freeze, expand, and can crack pipes from the inside.
Using a high-volume, low-pressure air blower (such as a liner vac or a shop vacuum set to blower mode), blow out each plumbing line until only air is coming through. Return lines and skimmer lines are typically sealed with winterizing plugs after they're cleared. Main drain lines are usually winterized by creating an air lock at the equipment pad rather than plugging the drain itself. Follow your pool manufacturer's recommendations for the proper winterization method.
Use pool or RV antifreeze (propylene glycol based), never automotive antifreeze (ethylene glycol). Automotive antifreeze is toxic, while pool and RV antifreeze are designed for plumbing systems. In areas where it's recommended, or for extra protection, add pool or RV antifreeze according to the manufacturer's instructions after blowing out the lines.
Above-ground pools have simpler plumbing. Disconnect and drain the hoses connecting the pump and filter, plug the pool's inlet and outlet openings with winter plugs, and store the hoses indoors if possible.
Step 7: Drain and Store Equipment
Once the plumbing has been winterized:
-
Pump and filter: Drain completely and store indoors or in a sheltered location. Water left inside will freeze and crack housings.
-
Heater: Drain fully per the manufacturer's instructions.
-
Chlorinator or chemical feeder: Empty it out — chlorine left inside over winter can corrode the equipment.
-
Above-ground pool pump and filter: Disconnect, drain, and bring inside entirely.
Step 8: Cover the Pool
The right cover protects the water from debris and sunlight, both of which can contribute to algae growth over the winter.
Solid covers block light completely and prevent debris from entering. They require a way to manage water accumulation on top (a cover pump or drain). They're the better choice for algae prevention.
Mesh covers let rainwater and snowmelt pass through while keeping out most leaves and other large debris. They're easier to manage in snowy climates because water doesn't pool on top, though they allow more sunlight and fine debris into the pool than solid covers.
Whichever type you use, make sure it's fitted properly and secured tightly. A cover that works loose in winter winds lets in debris and light. For above-ground pools, place an air pillow under the center of the cover before securing — it distributes ice expansion and keeps water from pooling in the center, taking stress off the pool walls.
Check the cover periodically through winter. Remove accumulated water from solid covers using a cover pump, and clear excessive snow accumulation if recommended by the cover manufacturer to prevent unnecessary stress on the cover.
Why It's Worth Doing It Right
It's worth being specific about the consequences of cutting corners:
-
Skip balancing the water: Acidic water corrodes metal fittings and etches plaster. Scaling can build up on pool surfaces, making spring cleanup much more difficult.
-
Skip shocking: Algae establishes over winter and you open to a green pool that can take days, or longer, and significant chemical cost to clear.
-
Skip blowing out the lines: Frozen water expands and cracks PVC pipes. Repairs can run hundreds to thousands of dollars depending on how many lines are affected and how accessible they are.
-
Skip draining equipment: Pump and filter housings crack. A replacement pump is one of the more expensive pool components.
-
Poor cover fit: Debris, sunlight, and contaminants enter the pool throughout the winter, increasing the likelihood of algae growth. You lose most of the benefit of closing properly.
Summary
Closing properly takes a few hours but protects your water, surfaces, and equipment from months of damage. Here's the full process at a glance:
-
Clean the pool (skim, brush, vacuum, remove accessories)
-
Balance water chemistry (alkalinity → pH → calcium hardness)
-
Shock to 10–12 ppm, then add algaecide once chlorine drops. Or use a double dose of Simple Scoop to replace both steps in one.
-
Clean and drain the filter
-
Lower the water level
-
Blow out and winterize the plumbing lines; add pool antifreeze where recommended.
-
Drain and store all equipment indoors
-
Cover securely; add air pillow for above-ground pools
Follow these steps, and you'll give yourself the best chance of opening to clean, clear water instead of an expensive spring surprise.